
EasyDose Dosing Gun Instruction Manual
Product overview
Congratulations on your purchase of a Te Pari EasyDose Gun. This digital, self-powered dosing gun allows you to deliver doses with both accuracy and speed.
Difference between the EasyDose and Revolution models
There are two Te Pari Dosing Gun Models - the EasyDose model and the Revolution Smart model. Both the EasyDose and the Revolution allow for dosages to be set manually using the digital keypad. The Revolution can also connect to the Te Pari Scale System via Wi-Fi to automatically calculate and set the dose rate based on the weight of the animal. This manual is specifically for the EasyDose Gun.
EasyDose Gun box contents
A. Feed tube and two anti-kink coils
B. Intellicharger – auto-sensing battery charger
C. 12-volt power supply – for the battery charger
D. Mains power supply – for the battery charger
E. Spares kit with 1x piston O-ring, inlet and outlet valve assemblies, and valve retainer C-clip for outlet valve.
F. Two high-quality 18650 lithium-ion batteries
What is not pictured here is stored underneath the box layer

Main Screen
The current dose is prominently displayed at the top of the main screen. The top-right corner shows the battery level.

Power button
Click once to switch on. The Te Pari logo, followed by the gun model and 2 brief safety warnings will be displayed before the main screen appears. Press and hold momentarily to switch the gun off.

Prime button
Click the prime button once. The word “Prime” will be displayed to show that the gun is in Prime mode.
- Once the gun is in prime mode, pull and hold the trigger. The gun will dispense a full barrel load and then return to the retracted position and stop.
- Release, then pull and hold the trigger again to dispense another full barrel. Continue until fully primed.
- mPrime allows for incremental adjustments to remove the last of the air in the barrel.
- Holding the prime button for 10 seconds will lock/unlock the dosing gun.
- The trigger may be released to stop priming at any time during the cycle.
Up and Down buttons
These buttons are used to increase or decrease values or to change a selection when displayed. Most setting changes are made using these buttons.
Changing the dose amount
Clicking the up button once increases the dose by 1 ml (70 ml barrel) or 0.5 ml (14 ml barrel).
Pressing and holding it scrolls the amount up quickly. The down button works in the same way.
Changing a selection
Pressing either the up or down arrow will change the selection for the current item.
The selected option is shown with a box around it.
Menu button
Each time the menu button is clicked, it cycles through the menu for access to the following items: Dosing Speed; Refill Speed, Sound, Tick Timer, and Barrel Change Sequence.
Refill Speed
With the screen displaying the refill speed icon (arrows pointing right), press the up arrow to increase the refill speed or the down arrow to decrease the speed. The arrows will change to show the selected speed.
This example shows maximum speed. Slower speeds are for more viscous liquids and faster speeds for less viscous liquids.
Dosing speed
With the screen displaying the dosing speed icon (arrows pointing left), press the up arrow to increase the dosing speed or the down arrow to decrease speed.
The arrows will change to show the selected speed. Slower speeds are best for more viscous liquids and faster speeds for less viscous liquids.
Sound
The gun can issue an audible double beep to confirm dose delivery.
With the screen displaying the sound icon, press the up or down arrow to turn the sound on or off.
Tick Timer
The Tick Timer shows a tick mark on the screen when a dose has been delivered. With the screen displaying the Tick Timer icon, select the length of time, in seconds, how long the tick should stay on screen. “0” is off and no tick will be displayed.
The Tick Timer helps to avoid any accidental dosing immediately after applying product to an animal.
How to change the barrel
Barrel Change Sequence
The barrel change sequence is the last item accessed from the menu button.
You use it to change the barrel from the standard 70ml barrel to the smaller 14ml one.
When you select the tick and press the menu button on this item you enter the barrel change sub menu described below. Pressing and holding the Menu Button at any time returns you to the main screen.
1. Remove the barrel
The arrow flashes on the screen. Remove the barrel collar and remove the barrel. Press the menu button for the next step.
2. Remove the piston
The arrows flash on the screen. Remove the piston by holding down the trigger of the gun and gently pulling it out. Press the menu button for the next step.
3. Load the piston for the smaller barrel
The arrows flash on the screen. Load the piston by holding down the trigger of the gun and introduce the piston to the drive thread. The piston stops in the “Home” position and the screen automatically advances to the next step.
4. Select the barrel size you are fitting
Use the arrow keys to select the size of the barrel being installed, then press the menu button to proceed to the next item. To avoid damage, it is important to ensure that the correct setting is selected for the barrel and piston size installed.
5. Fit the barrel
Fit the new barrel to the gun with the collar. Press the menu button to complete the sequence.
6. Barrel change complete
The screen displays a gun icon with a tick to show the process is complete. The gun saves the changes and automatically returns to the main screen.
Note: When using the 14 ml barrel, dose increments change to 0.5 ml.

Barrel size and delivery specifications
70 ml Barrel:
Doses of 5 to 300 ml. Dose-volume increments of 1 ml. Volumes from 71 to 300 ml are delivered in up to five sequential shots.
14 ml Barrel:
Doses of 1 to 28 ml. Dose-volume increments of 0.5 ml. Volumes from 14.5 to 28 ml are delivered in two sequential shots.
Sequential shots:
These are delivered automatically and immediately after the first shot with just one trigger click until a complete dose has been administered.
Statistics button
The statistics button shows the volume of doses administered and the total number of doses administered. Each press scrolls through the various items.
Volume of administered dose
Shows the total volume of dose administered.
Number of doses
Shows the total number of doses administered.
Clear stored statistics
You can choose either “Clear Last” statistics or “Clear All” statistics. Push the Statistics button until you find your preferred option.
With the screen displaying your preferred clear option, press the up or down arrow to select the tick or the cross. With the tick highlighted, press the Statistics button again to clear it.
The display will return to the main menu, and the number of doses and volume statistics will be reset to 0 for either the last statistic or all statistics depending on what you chose.
Preparing the gun for use
Connect the feed tube from the gun to the fluid container. See the instructions below.
- Set the gun to prime.
- Press and hold the trigger until fluid fills the barrel.
- Point the tip of the gun vertically to remove the last of the air from the barrel.
- Press the prime button to return to the main screen.
- The gun is now ready for use.
Warning: Exercise caution when dispensing fluids.
Fitting the feed tube
A. Unclip the retainer and fit the feed tube with an anti-kink coil through it.
B. Press the tube and coil snugly into the retainer recess, with the retainer’s flared end pointing backwards.
C. Refit the clip with the hose and coil fitting over the attachment.
D. Ensure the valve housing knurled ring is snug and has not loosened while fitting the tube and coil.

EasyDose Gun set-up and operation
Dose on weight
1. Dose set up
- Power gun on.
- Press the Menu button and select weight with up/down keys.
2. Select dose units
Select dose units with up/down keys, and press Menu button to continue.
3. Select dose rate
- Set mL/kg or cc/lb using up/down keys.
- Save settings using the menu button.
4. Adjust weight
Adjust weight using up/down keys to have the dosage adjusted.
Dose on volume
Setup & operation instructions for EasyDose Guns.
1. Select dose by volume
- Press the menu button to switch mode, and select volume using the up/down keys.
- Save by pressing the menu button seven times through options.
2. Adjust volume
Adjust volume with up/down arrows.
Care, Maintenance and Storage
- To ensure the continued high performance of your gun, always clean and lubricate the gun immediately after use.
- Start by reading the cleaning instructions provided by the fluid manufacturer.
- Remove the inlet tube from the fluid container and empty the fluid from the gun and inlet tube.
- Place the end of the inlet tube in a mixture of warm water and a little dishwashing detergent, then flush about 1 litre through the gun until it is clean. Flush again with clean water.
- Inspect the inlet valve and outlet valve and ensure they are clean.
- Remove the barrel and wipe any residue from the barrel with a soft tissue.
Important – Lubricate the valves, piston O-ring, and barrel with a small amount of vegetable oil after cleaning and before storing the gun.
- Periodically remove the valves and wash in warm water and dishwashing detergent. To access the inlet valve, unscrew the front of the inlet valve housing. To access the outlet valve, remove the nozzle and cap then use a small screwdriver to release the C-shaped valve retainer, being careful not to damage it. Be sure to refit it after cleaning as the outlet valve will not function without it.
- Wipe the exterior of the gun with a damp cloth and dry off. Do not submerge the gun in water when cleaning.
- Store the gun in a clean, dry place, out of direct sunlight. Recommended storage temperature is from -10° to 35° C (14° to 95° F). Store above 0° C for optimum battery performance.
- If batteries are in a low charge state, fully charge them before storage. Remove the batteries before storing the gun.
- The main barrel can be easily separated from the body to aid in cleaning and maintenance by undoing the barrel collar. Do not over-tighten the barrel collar and ensure all O-rings and felt washers are fitting correctly when refitting.

Exploded views of inlet and outlet valve assemblies
Note: The gun will not function correctly or at all if the valves are in the wrong way around.


Charging the batteries
The Te Pari EasyDose Gun is supplied with an intelligent charger that can recharge both lithium-ion batteries at once.
- Remove the battery clip from the base of the gun handle by squeezing in both sides of the clip and gently pulling the clip out.
- Fit each of the batteries into the charger by pulling down the spring-loaded retainer, slotting the battery in, and then releasing the retainer. The negative terminals go on to the spring-loaded end, with the positive terminals going nearest the lights.
- Connect the charger to a standard mains supply using the cable provided and switch it on. The charger’s lights will run up and down while the battery type, state, and charge required is determined. A 12-volt cigarette lighter cable is also provided to power the charger in a vehicle. The charger’s lights will flash slowly in orange, showing the charge progress. When all three LED lights are lit a steady green, the batteries are fully charged and ready for use.
- Before reloading the batteries, ensure that the contacts inside the gun’s battery clip are clean and dry.
- Squeezing the sides of the battery clip, push it back into the gun handle. The clip only fits into the gun in one direction, with the curved end facing forward.
- Ensure that the polarity symbols match (+ to + and - to -) as marked on the clip and the batteries.
IMPORTANT NOTE: The battery's outer coating must be intact. Damaged outer coating may result in a short circuit and fire.
Dosing Gun Battery Parts
- Gun handle bottom
- Battery clip. Squeeze the sides of the tabs on the clip to remove or refit into the handle. Note the white terminal markings.
- The two lithium-ion 18650 batteries. On this type, the black band is on the positive end, but this may vary from other makes, so be sure to check before fitting.
- The curved end of the clip goes to the curved end of the handle when refitting the battery clip.
Battery Charger
E. Orange flashing lights showing that the batteries are charging and their state of charge.
F. Three green steady lights mean the batteries are fully charged and ready for use.
Note: Please use only the supplied batteries.
Product warranty
The company warrants that the product you have purchased is free from defects in materials or workmanship under normal use during the limited warranty period.
The warranty period starts on the date of purchase from the company or authorised gun agent. Please keep the dated sales receipt for proof of purchase as you may be required to provide proof of purchase as a condition of receiving warranty service.
The gun has a 1-year limited warranty. The rechargeable batteries have a 1-year limited warranty. The battery warranty does not cover changes in battery charge capacity and is limited to defects in materials or workmanship resulting in battery failure.
During the limited warranty period, the company will repair or replace the defective component or product. All components removed under this warranty become the property of the company. The replacement component will take on either the remaining warranty period of the removed component or a ninety (90) day limited warranty for the spare part, whichever is longer. The replacement component may be manufactured from new or used materials equivalent to new in performance and reliability. The company reserves the right to improve or modify products from time to time without assuming the obligation to modify products previously manufactured.
The company is not responsible for damage that occurs as a result of (1) failure to follow the instructions that came with the product; (2) accident, misuse, abuse or other external causes; (3) voltage surge or lightning strike; (4) modification, tampering or service by an unauthorised service provider.
Normal wearing parts requiring replacement or adjustment are not covered by this warranty. These parts include but are not limited to: O-rings, springs, bearings, motor brushes, and tubing.
The company is not liable for any damages or personal injury caused by the product or the failure of the product to perform, including any damage or loss of data on the product or computer.
The maximum liability of the company under this limited warranty is limited to the lesser of the cost of repair or the replacement of the product.
In the event of the product requiring servicing under the terms of the warranty, contact your authorised dealer. The product is to be returned to the service centre at the expense of the purchaser.
These conditions constitute the complete and exclusive warranty and supersede all other warranties, representations or conditions relating to this product.
Warranty Claim Form Online
To complete a warranty claim form, please get in touch with our team via our Contact Us page.
Health and Safety Warnings
- Because the toxicity and precautions required for the handling of agricultural health fluids vary, follow the manufacturer’s recommendations in regard to protective clothing, eyewear and handling precautions for the fluid being administered.
- Always be cautious when dispensing fluids.
- Always handle agricultural fluids with care.
Dosing Gun Cautions
Gun
- Operating temperature for the gun is between -10° to 40° C (14° to 104° F).
- The gun is environmentally sealed and meets IP53 standards.
- Keep the gun as dry as possible, drying it off if it becomes wet.
- Do not submerge the gun.
- Do not tamper with or remove the case screws as this will void the warranty.
Batteries
- The gun is designed to use two 18650 lithium-ion rechargeable batteries. Only use approved batteries.
- Dispose of used batteries according to the manufacturer’s instructions.
- Do not heat above 50° C (122° F).
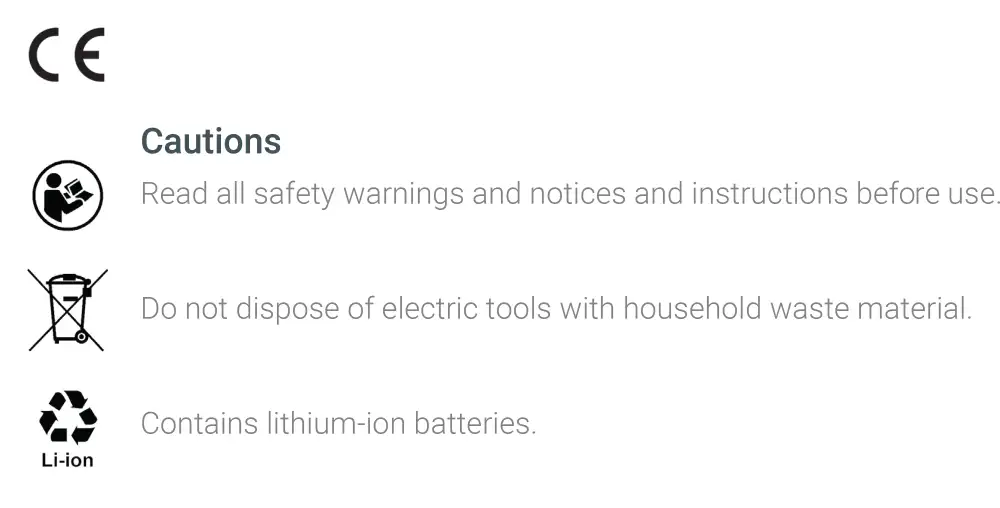
- Do not dispose of in fire or crush, puncture or directly short circuit.
- Keep batteries clean and dry.
- The battery's outer coating must be intact. Damaged outer coating may result in a short circuit and fire.
FCC Notice
This device complies with part 15 of the FCC rules for Class A digital devices. It can generate, use and radiate radio frequency energy, and if not used in accordance with the instructions may cause harmful interference to radio communications. In a residential area, it may cause harmful interference, which will be required to be corrected by the user at their own expense.
Trouble shooting
Please check this troubleshooting guide before contacting customer support.
| Problem | Possible Solution |
|---|---|
| Dosing Gun is showing Error 94, c08 10, power off. | 1: Put the gun into update mode by holding the down button then quickly pressing the on button. |
| 2: After the 4th bar loads and the screen shows upgrade, turn it off then on again. | |
| 3: We recommend updating the firmware as well, see the tutorial video below. | |
| Dosing Gun shows Error 56 | This is when the wrong barrel is on the gun. Watch the "How to change the barrel size of your dosing gun" video below. |
| Lock symbol on the screen and can't adjust the dose | Hold down the prime button to unlock the gun. You can lock it again by the same action. |
| This feature is on the EasyDose Model guns so the dose amount is not accidently adjusted while being used. | |
| Dosing Gun comes up with a Stall Error when delivering product | 1: The Gun has a built-in stall feature to prevent overloading. Try reducing the piston speed. |
| 2: Remove the barrel and valves (inlet and outlet) and make sure everything is clean and moves freely. | |
| 3: Check the drive thread. Remove the barrel and pull the trigger and see if the gun stalls. If it stalls without the barrel it could be a tight drive thread. The drive thread is self-lubricating however a small drop of oil could help. If the drive thread is tight and makes the motor labour then the drive thread and piston should be replaced. | |
| 4: Check that your injection site is correct. The gun may stall if the needle hits a bone. | |
| 5: If the Gun still stalls then take note of where the piston is stalling and contact Te Pari. If it is stalling on the return stroke there could be an issue with the magnet sensor in the piston which detects the home position. Contact Te Pari for support. | |
| Dosing gun displays stall error immediately upon start up | The piston is likely missing a magnet or the wrong barrel was set when changing the piston size. |
| 1. Hold both Menu and Up arrow and turn the gun on. | |
| 3. Press P (Prime button) to step to the next option which is test mode. | |
| 4. Press P again and you will get the Piston Load screen. | |
| 5. Tap the Power button to enter this menu. | |
| 6. Use arrows to get the piston off. | |
| 7. There are two magnets located at the base of the piston in a 12 & 6 o’clock position. If for whatever reason there is only one magnet in place, refit the piston to the gun with the magnet at the 12’oclock position and the gun should return to operation. | |
| If this doesn’t work then contact Te Pari and organise it to be returned for repair. | |
| Dosing Gun is randomly turning off | Possible cause: The springs that hold the battery in place may not be effective after a lot of use. |
| Fix: Remove the bottom cap from the gun, and the batteries. With your finger, lift the springs a little so they are in better contact with the battery. | |
| Alternatively, return your gun to Te Pari to have new springs fitted. This can be added free of charge into a general service if requested. | |
| Dosing Gun barrel will not fill or suck in the liquid. | If the barrel is not filling it means that it is sucking air and not the liquid. Mostly likely the air is coming in the main outlet valve at the end of the barrel. It could also be inlet valve which is on the side of the barrel where the tubing connects. |
| 1. Remove the outlet valve and clean it. Check there is no grit on the inside where the valve seats or on the oring. Use a piece of cloth/rag to clean it or a small brush. | |
| 2. Repeat this for the inlet valve. If either of these valves continue to not seal then replace them with the spare valve from the Spares kit. | |
| 3. On the 14ml barrel the valves are both he same size. On the 70ml barrel the larger valve is used on the outlet at the end of the barrel. |
Product Videos

Thank you for purchasing a Te Pari EasyDose Gun. If any issues arise with its use, please do not hesitate to contact our Support Team by phone or online, we are here to help.