
Hoof Handler Crush Instruction Manual
Product Overview
Your safety is our focus
All Te Pari crushes and handlers are designed to deliver the ultimate in safety. At times working with livestock can be a dangerous business so we have designed many features into our Hoof Handler Crushes and headbails to reduce the risk of accidents and injuries.
Ratchets and pawls by their very nature are prone to wear, before starting a session we strongly recommend checking over the operation of your crush with particular attention to the locking action of the head bail. Animal safety is also of great importance, so all our equipment is designed to get the job done with minimal discomfort and distress to the animal.
At Te Pari Products we take quality seriously. We only manufacture from top-quality materials and have thorough and effective quality control systems in place. Our production systems mean our products are of the highest standard, so much so, that from the time of purchase, our Hoof Handler Crush carries a full 36-month structural warranty.
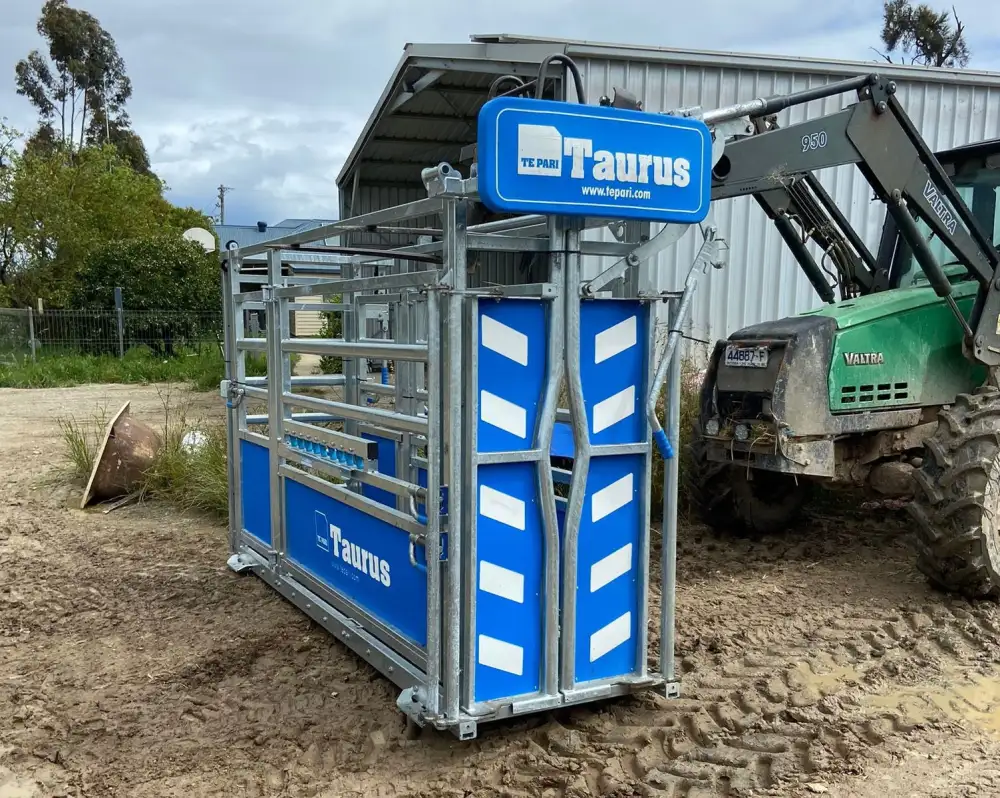
Hoof Handler Vetless Crush
Designed specifically with the dairy farmer in mind, the Hoof Handler has superb facilities for hoof paring whilst giving excellent access to all other areas of the cow for vet work and general handling. Featuring the proven C1000 Headbail, the handler provides a safe firm restraint for any size cow whilst in the cattle crush.
Hoof Handler Vet Crush
The Hoof Handler Vet Model has an extra section at the rear of the crush that gives you more room to work behind the cow. The rear sliding gate is an optional upgrade on this model and is shown in this photo.
Parts of your Hoof Handler Crush
Vetless model with optional rear head bail handle and front hoof blocks is shown.

Optional accessories
- Front hoof blocks - shown in the photo to the right.
- Timber floor with rubber lining provides a quiet and non-slip surface for the animal to stand on.
- Rear handle for head bail operation - this option is shown fitted in the main image above.
- Sliding gate at the rear - only available on the vet model Hoof Handler Crush.

Unloading Instructions
If your unloading facility is not capable of lifting the total weight safely unload any additional products that may have been stored inside the crush for transport.
The best option is to use a forklift under the top main chassis rail. Take special care to avoid placing loads upon the winches, shafts and handles.
If you notice any freight damage on arrival, please notify Te Pari Products immediately. We also recommend that you write details of any damage that may have occurred on the driver's copy of the delivery consignment note.
Te Pari have delivery trucks in New Zealand and Australia equipped with hiab cranes for unloading.

Installation Instructions
Mounting Scales Floor models only
If you're mounting scales the Hoof Handler Crush needs to be free-standing, so ensure that gates are not latching onto or swinging off the crush.
Bolt the load bars underneath the crush to the mounting points on the chassis rail. A flat and level concrete surface will be necessary to ensure accurate weighing.
| Specifications | Hoof Handler Vet Model | Hoof Handler Vetless Model |
|---|---|---|
| Overall Length | 3530mm | 2560mm |
| Vet Section | 780mm | - |
| External Width | 1100mm | 1100mm |
| Inside Width | 750mm | 750mm |
| Overall Height | 2182mm | 2182mm |
| Weight | 740kg | 630kg |
Health & Safety
General Cattle Handling
Keep calm and in control!
A calm and decisive operator will help prevent the cattle from becoming alarmed or over-excited. This is one of the most important rules of good cattle handling.
Quick reflexes are required to catch horned animals, because safety is of primary importance we recommend the baulk gate option is fitted for catching horned animals.
Health and Safety
- Keep your hands, fingers and limbs well clear of any pivots, hinges or other pinch points on your crush, for example, the headbail doors, and other moving mechanisms.
- Do not enter the area in front of the crush until you have checked that the animal is fully secured. It is safe work practice to keep clear of this area.
- Whenever possible do not work alone.
- Make sure you read and understand the correct operating procedure for your crush before you use it.
Operating Instructions
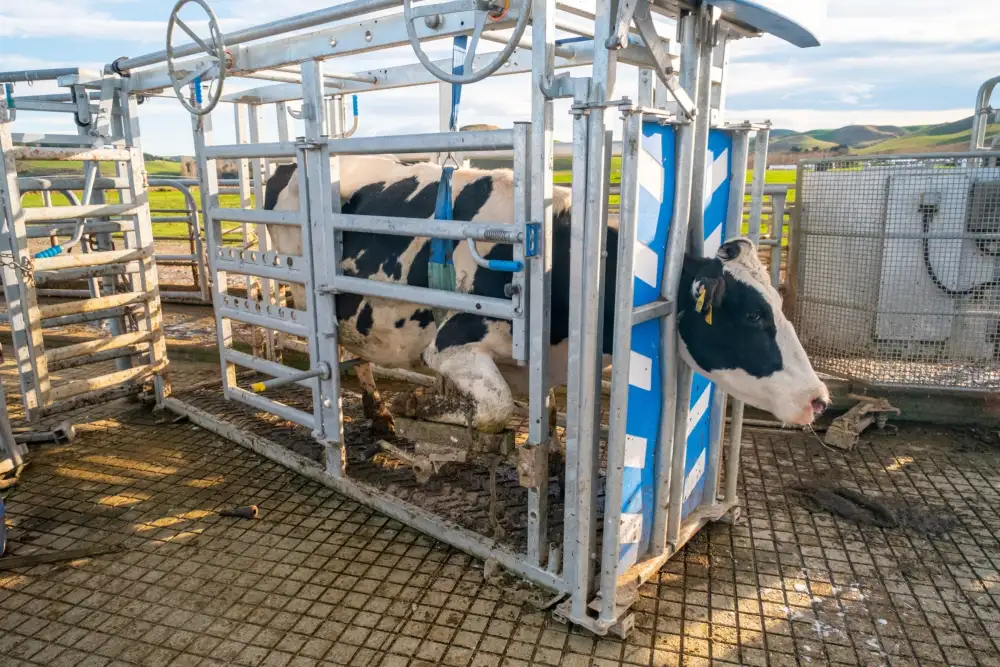
Loading and securing the animal
- In the interests of safety before commencing a session we recommend checking the headbail operation and testing its locking mechanism before use.
- Open the sliding gate and allow the animal to enter.
- Once the animal has entered close the sliding gate.
- Close the head bail. Note - the head bail doors should be set to allow the animal's head to fit through but not its shoulders, this is a gap of about 300mm.
- Fit the belly straps one at a time D. Slip each strap under the animal and attach it to its winch with the clips. Wind up each winch to take the weight of the animal.
- The animal is now restrained and ready to process further as required.
Important note: do not lift the animal with the belly straps.
Fitting the belly strap
- Before letting an animal into the crush unwind the belly strap and lay it across the floor. Doing this prevents the operator from having to reach under the animal to get it.
- Once an animal is head bailed in the crush attach the belly strap to the winch.
- Tension the belly straps up close to and fit snugly to, the animal's belly this will help ensure the animal does not go down. Don’t tension the belly straps up too tight as this will encourage the animal to kick and/or slump down onto the straps.
- Belly straps only ratchet up when wound clockwise.
- Belly straps are designed to take a portion of the animal's weight only so that extra stress is not placed on the standing limbs while one leg is raised to be worked on. They are not for lifting the animal.
- The hooves of the animals that are not being worked on should remain firmly grounded.
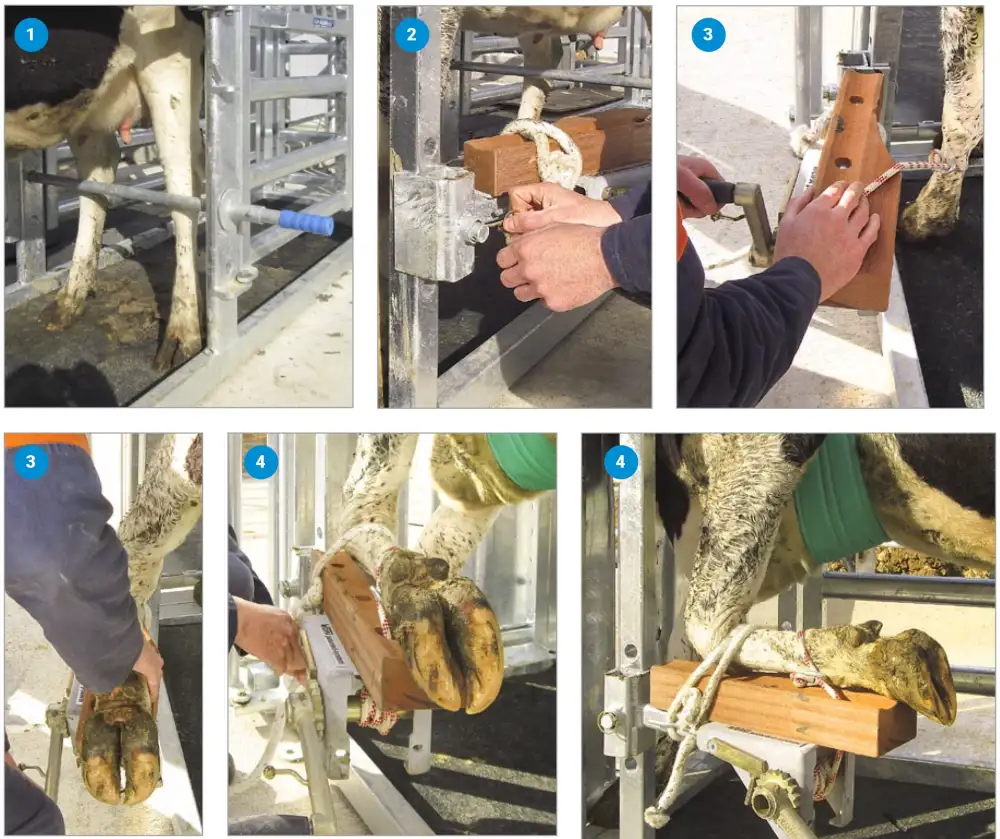
Front Leg Restraint
Load and secure the animal as described on the previous page.
- Front kick bar.
- For protection insert the front kick bar into the highest slot possible.
- At this point you can also remove the lower side gate for ease of access.
- Fit Hoof Block.
- If not installed already, fit the hoof block and fix it in place to suit the size of the animal using the hoof block fixing pin.
- Winch leg onto Hoof Block.
- Release the winch rope by pushing the lever on the winch handle. Secure the animal's lower leg just below the dew claw by attaching the forward hoof block rope.
- Slowly winch the hoof up onto the hoof block, You will need to guide the animal's leg into position on top of the hoof block, sometimes it helps to gently bend the animals knee.
- Leg Support Rope
- Then attach the extra support rope to hold the animal's leg in place closer to their knee.
- The hoof is now secure and ready to work on. Process, then remove the front leg restraints in reverse sequence.
Rear Leg Restraint
Load and secure the animal before restraining any legs.
- Fit the leg ratchet bar.
- Place the leg ratchet bar in position. It is easy to adjust this out to a position that suits the animal and you, so start a little closer as the final position will vary depending on the size of the animal - refer to the position in the image.
- Fit rear hoof rope.
- Loop the rear hoof rope around the animal's ankle first and then up to, under and around the ratchet bar.
- Rear hoof rope to the winch.
- Then bring the rope up to attach the free end to the rear hoof rope winch.
- Winch rear leg onto ratchet bar.
- Raise the animal's leg with the winch F to rest gently against the ratchet bar and adjust the bar out to slightly extend the animal's leg and reduce kicking.
- The hoof is now secure and ready to work on G.
- Process, then remove the leg restraints in reverse sequence.

Releasing the animal
- When your work is complete ensure all the leg restraints have been removed.
- Release the tension on the belly straps, unclip them from under the animal and stow them.
- Remove the front kick bar and stow it.
- Release the animal through the head bail.
Tip: You can release the animal before removing the ratchet bar, this can help because it prevents the animal from backing up.
Product Warranty
We stand by our products and services!
For peace of mind, we offer a manufacturer's warranty on all our products.
See our website to find details of what’s covered in your warranty and a form to submit a warranty claim.
If there ever is an issue with anything associated with our equipment, we don’t avoid it like other companies may do. Our qualified Technical Support team provide the best service possible with quick responses and flexibility for your needs. It’s the Te Pari difference… ‘trustworthy customer support’.
Hot Dip Galvanising
Any Hot Dip Galvanizing on your Te Pari product is warrantied for 10 years from the date of purchase from Te Pari.
Structural
Any steel work or structural fabrication on your Te Pari product is warrantied for 3 years from the date of purchase from Te Pari.
- Head Bail Guarantee
The mechanical locking system (lockbox) on the C1000 Head Bail is covered with a lifetime warranty. If there’s ever a problem with the C1000 locking system Te Pari will fix or replace it for free.
Before proceeding, Te Pari must authorize any warranty repairs or replacements. For more details, refer to the warranty terms and conditions.
Cleaning & Maintenance
Cleaning
For the longevity of your Hoof Handler Crush, we recommend that it is cleaned down thoroughly after use. Cattle urine and faeces can have a corrosive effect on your equipment.
Lubrication
Lubricate all grease nipples, pivots and tracks on your Hoof Handler Crush unit at least once per month or every 1,000 animals processed. The nylon wheels on the sliding gate require lubrication once every 2 months.
Checking for wear and damage
Check the headbail lock system for wear and tear at least once every 6 months, or every 1,000 animals processed. The pawls or locking plates on the crush head bail can be turned over to provide a fresh edge - effectively doubling their life.
Annually check pivots and bolts for wear and replace as required.
A full range of replacement parts is available from Te Pari.
Product Overview Video

Thank you for your purchase.
Our promise is simple...
It works for you (or we will take it back).
We offer a manufacturer's warranty on all our products for peace of mind. Visit our website for more information.