
iStick 7 EID Reader Instruction Manual
Please go through this manual thoroughly with your reader handy to get familiar with general button use, item selection, screen navigation and the layout of your reader's controls.
Scope of this manual:
Your Te Pari iST7 reader also has extended features, including database animal management and task list functions. These enable you to upload lists and data and then refer and notate these during reading sessions. You will see references to these items in this manual. These features are provided when the source database or list is uploaded to your reader from Te Pari Downloader on your computer; these extended features are not currently covered in this manual.
Box contents
- Te Pari iStick 7 EID Stick Reader
- 3 Part “Y” cable
- Mains power cable
- This operational manual
Note: The batteries are supplied charged and already installed.

Charging your iStick 7
Your Reader is supplied with 2 cables:
- A power cable that has a mains plug at one end and a sleeve plug at the other
- A 3-part “Y” cable that has an IP67 reader plug at one end A, that splits to a sleeve plug B, and a standard USB plug C.

To charge your iST7 Reader
Attach the IP67 reader plug of the 3-part “Y” cable to the lower handle of your reader. The end of the plug has a sleeve that turns to lock it in place. Insert the plug with the sleeve in the unlocked position.
D the white arrow aligns with the lug on the plug inside when unlocked and E when plugging in, align the white arrow on the plug sleeve and the white line on the reader plug.
Holding the plug in, twist the sleeve so the green locked icon aligns with the arrow on the reader body, see image F.

Attach the sleeve plug of the 3-part cable to the sleeve plug of the power cable G.
Plug the 2-pin plug into a standard domestic 3-pin mains outlet.
When you switch on the power at the mains outlet the reader's internal batteries will charge. A full charge provides about 30 hours of non-reading activity or about 10 hours of continuous reading. When charging the left-hand LED above the display, on the facia, flashes red every second. When fully charged the LED and the reader tip are lit green continuously. You may use the iST7 while charging.

Screen navigation
Turning the iStick 7 Reader on and off
Pressing the Enter key will turn the unit on. The iST7 powers down automatically after a set time when not in use. You can set the length of inactive time to power down to your preference, from a few seconds to an hour. To turn the iST7 off at any time, press and hold the Down Arrow for 2 seconds.
Screen overview

Navigation - General
The Arrow keys are used to move a highlighted field over a displayed list of options. Clear Data from the Data Menu has been highlighted in the example here. The Enter Key is pressed to select or OK the highlighted option. Pressing it in this example would take you to the Clear Data menu. The text on the Red Key Function Area and Blue Key Function Area on the display change, depending on the area you are in. They tell you what pressing the Red or Blue Key will do. In the example here pressing the Red Key would go Back and pressing the Blue Key will Exit. Exit is the same as cancel on a PC and exits the operation without saving.
EID Reader tip LED lights
The iStick 7 EID Reader has an LED light in the tip that flashes different colours to indicate its operation.
- Flash Red when reading (searching for a tag)
- Flash Green when a tag is read, and when in continuous Read Mode
- Blue when the read tag is a duplicate.
- Tip also lights Green continuously when charging and the battery gets to a fully charged state.
Battery charge status icon
The battery charge icon is on the main navigation screen.
You can use the reader while it is charging.
If after checking the cabling and power supply the Charging Error icon is shown repeatedly, it may mean the battery needs to be replaced.
Bluetooth status icon
The Bluetooth status icon is only displayed when the Bluetooth is turned on.
WiFi and other connections
The WLAN (WiFi Local area network) status icon is only displayed when the WLAN is turned on.
The USB and RS232 icons are only displayed when a connection is active.
Getting Started - Creating a New Group
To start with you need a group to add your data to.
Start the iST7 by pressing the Enter Key.
Then press the Blue Key to start a New Group.
Pressing the Red Key in the first window back spaces out any existing entry. You can give your group any name you wish of up to 16 characters in length.
Press the Up or Down Arrow and the character screen will be displayed, you can now use the Arrows and the Red Key to go through the 3 character screens. Highlight and press the Enter Key to select the characters one at a time, to make up your new group name.
Notice how the description on the Red Key Function Area of the screen changes depending on which screen you are viewing. Pressing it in this case toggling between numbers and capitals or lower case characters.

New group name
When you have finished typing your new group name, press the Blue Key to close and exit the character input screens.
Now press the Enter Key to add your New Group. You are returned to the main screen.
Adding a New Group can be accessed from either the main working screen or the main menu.
Reading an EID tag
From the main window press the Enter Key. When in Auto or Single Read Mode, the reader will search for a tag, counting down while it does, the LEDs in the tip of the reader will flash red while it searches. If no tag is found No Tag is displayed and after a few seconds you are returned to the main screen.

If a tag is read the LEDs will flash green and the tag number will be displayed. It also tells you what group the record is being saved to and how many records are in that group.

Main Menu
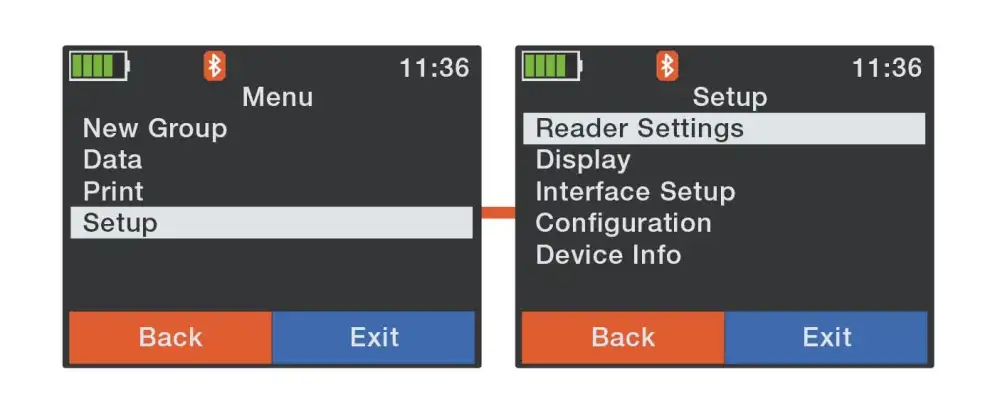
The main menu is accessed by pressing the Red Key while on the main screen. There are 4 main menu items:
- New Group - Which we have already covered
- Data - Where you manage and search for data
- Print - For record, group and barcode printing
- Setup - Reader configuration and information
You use the Up and Down Arrow keys to change the highlighted selection in screen lists and then the Enter Key to select it.

Data Menu
Access the Data Menu by arrowing to it and pressing the Enter Key with it highlighted.
It has 5 sub menu options.
The Show Data option allows you to view records.
Select a group, then an animal number (either EID or VID, which you toggle with the Red Key) from within that group and then view its details. Use the up or down arrow to scroll through the information screens.
Note: Whenever you view a record on screen its details will be displayed as shown here on the 2 info screens at the right

Data Menu - Clear Data
The Clear Data Menu lets you either:
- Clear Last Group - The last group you added to your reader.
- Select Group - Pick the group you wish to delete from a list.
- Clear All Groups - Removes all group data.
Upon completion of the action, you are advised of success and need to press the Blue Key to OK and return to the main screen.
The Data Menu - Memory Information and Search EID or VID in Database
The Memory Info option displays the number of records and groups on the reader. Press the Blue Key to OK and return to the main screen.

The Search VID in Database option allows you to key in the VID of animal that you wish to confirm is in your readers database, if it does find a record its details will be displayed.

The Search EID in Database option allows you to scan an EID tag and see if it is in your readers database. If no tag is found or the EID is not in the database the screens shown here are displayed, otherwise it does read a tag and find a matching record in the database its details will be displayed.

Print options
The iST7 requires a compatible printer to be setup prior to using the print option.
Enter the Menu Screen, Arrow down to Print and press the Enter Key for the Print sub menu.
You need to set your printer up first before printing to it.
The first 4 options of the Print Menu allow you to print either the last group, a group you select, all groups or a barcode for an animal as shown on this page.
- Print Last Group: Prints the details of the animals in your latest group.
- Select Group: Prints the details of the animals in the group you select.
- Print All Groups: Prints the details of the animals in all stored group.
- Print Barcode: Searches for and prints a barcode for EID tag found.

Printer Setup
The Setup Printer option is the last item on the Print Menu.
Set Printer Type: Displays a list of common printers to select from; highlight your option and press the Enter Key.
Set Printer Interface: Arrow select your printer interface and press the Enter Key to set.
Set Printer Baudrate: Arrow select your printer baudrate; 9600 is the default. Press the Enter Key to set.
Search BT Printer: Search for a Bluetooth printer. Have your Bluetooth printer on. If it is found, it will be added to your print list, and you can select it from there.

Setup Menu
When you Enter Setup from the main menu the Setup sub menu is displayed.
Reader Settings
Press Enter on Reader Settings to enter the Reader Settings Menu
Animal Counter On/Off option lets you record your total number of reads.
Set Read Mode option lets you select from:
- Single Read, reads each time you press enter from the main screen;
- Continuous Read, Reads without pressing the Enter key each time;
- or Auto.
Set Online Mode is for when you are sending reads directly to your attached device. An additional option selects the format the data is sent in. Shown below.
Set Output Format for data going directly to your device from the reader. NLIS is preferred.

Wireless Sync On/Off Synchronises with your Wireless device.
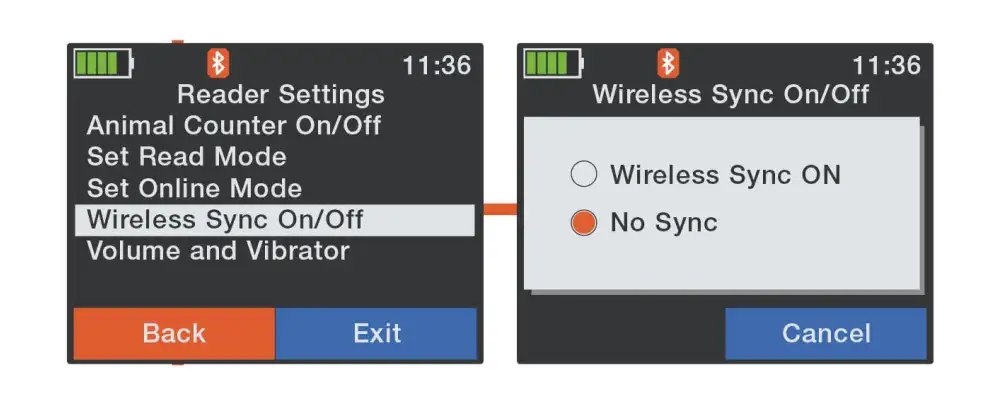
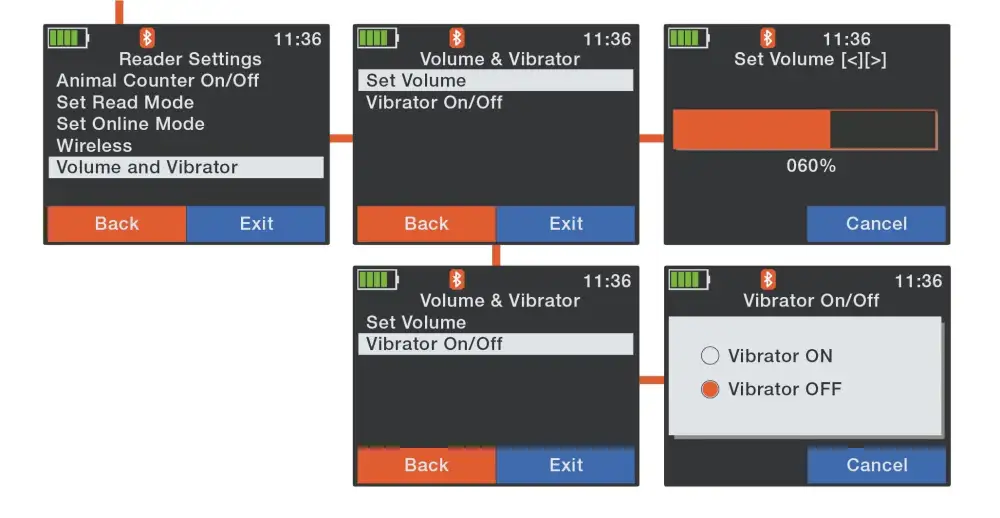
Volume and Vibrator Modes let you adjust the volume of the beeps when a read is successful and turn the Reader Vibration for a successful read On or Off. The vibration notification is useful in loud environments where the beeps may be difficult to hear.
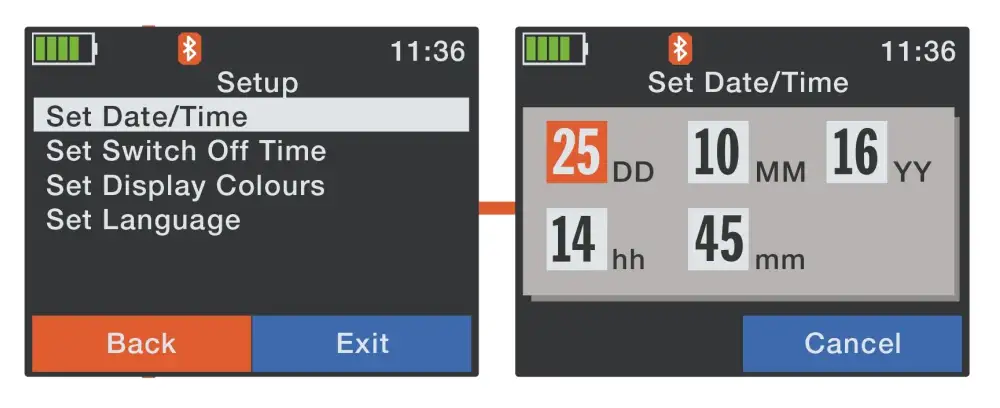
Display Menu
The Display Sub Menu lets you adjust; Date; Time; Screen Contrast; and Reader Language.
Set Date/Time
Use the left and right arrows to select item and the up and down arrows to change the value. The clock is 24hr format.
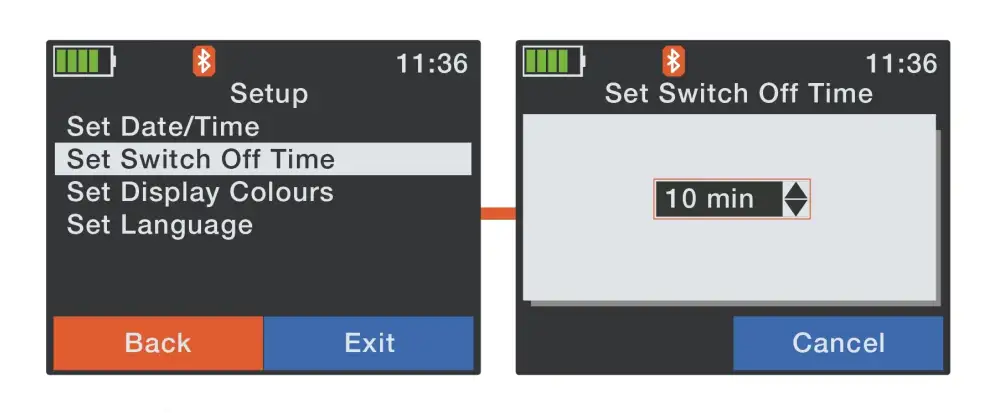
Set Switch Off Time
Up or down arrow to change the amount of time the reader is inactive before it turns off.
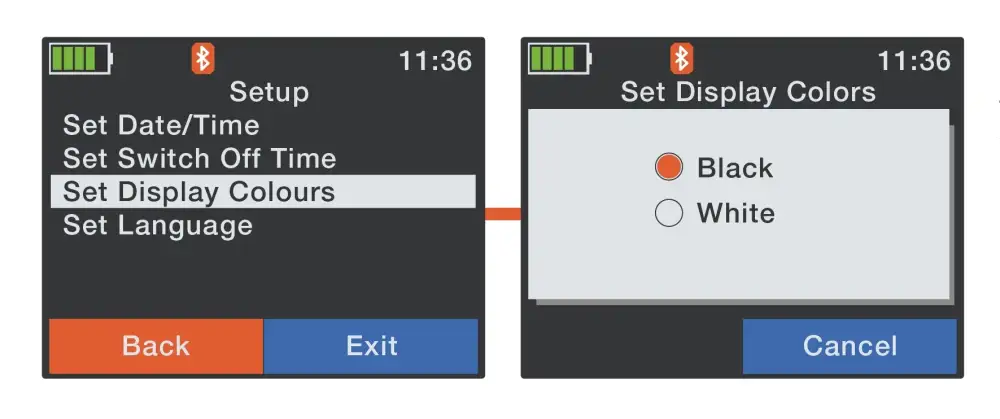
Set Display Colours
Changes the screen background from Black to White, to suit your viewing conditions, the black option uses less power.
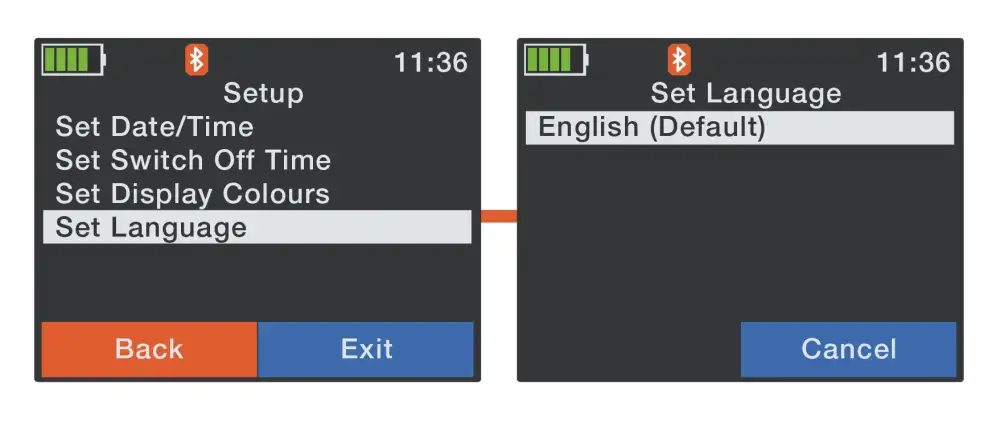
Set Language
Changes the reader's language.
Interface Setup
The Interface Setup Menu lets you adjust the settings that your reader uses to communicate with other devices.
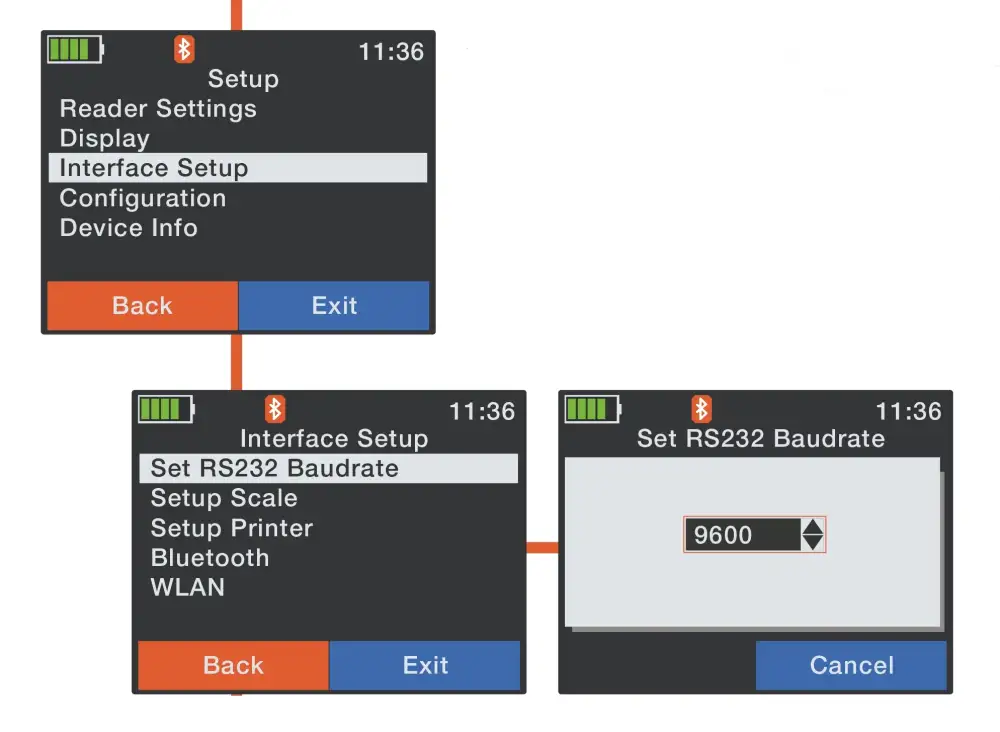
All baudrate settings are 9600 by default.
For your convenience, under Scale Setup, a list of scale indicators with preset settings is provided.

Bluetooth Menu items: Set Master Mode, Slave, or turn the Bluetooth OFF.
Start Bluetooth Enquiry to search for available devices and add them to your History list.
BT Device History lets you select and connect to a device you have connected to previously or delete your stored history list.
Bluetooth Menu items here: Set BT Profile options, communication protocols for your Bluetooth. Normally, this is SPP.
Set Bluetooth Passkey - Usually 1234
Show Bluetooth Info - Displays your Bluetooth settings and status.

WLAN (WIFI Network) Settings
When the WLAN Mode is set to Station, the WLAN Menu changes to provide an option to see available access points and their signal strength.
Note: The Wi-Fi icon is only displayed on the screen when it's turned on.

WLAN Protocol Setting
The WLAN Protocol should be set to TCP Client by default.
TCP clients actively initiate connections, while TCP servers passively listen for connection requests.

Configuration Set-up
The Configuration menu is used to reset the reader to its factory defaults.

Device Info
The Device Information sub-menu has the following options:
- Battery Info - A full report on the state of the battery with expected longevity information.
- Firmware Info - Your readers firmware information, used when troubleshooting.

Connecting your iStick to your PC
Important: Please read this section
In the first instance, it is important to have the latest version of Te Pari Downloader/Macrostock Lite installed on your computer.
Click here to go to our Downloads page to get the Macrostock Lite App
Accessing the files on your iStick is done from within the Te Pari Downloader application.
Once Te Pari Downloader is installed, you can add a Macrostock Lite icon to your desktop and also find the app under the Start menu. You can run the application from either of these.
The first time you run the application, you will be guided through the registration process.
With Te Pari Downloader app opened, you need to make a connection to your iStick to view and work with the files on it. You have 2 options available:
- A direct cable connection using USB - This is the most robust method of connection, and so is the one we recommend.
- A Bluetooth connection - Bluetooth must be available and active on the PC for this to function. Always use the Bluetooth to USB adapter supplied and install the driver for it from the disk that came with your iStick.
Connecting your iST7 to your computer with a direct cable connection
Connecting using the USB plug is the most reliable and easiest connection to make.
Attach the IP67 reader plug of the 3-part cable to the lower handle of your reader. To do this insert the plug with the sleeve in the unlocked position (the white arrow aligns with the lug on plug inside when unlocked and E when plugging in align the white arrow on the plug sleeve and the white line on the reader plug).
Hold the plug in, and twist the sleeve so the green locked icon aligns with the arrow on the reader body F.
The USB plug of the 3-part “Y” cable can now be attached to a USB port on your personal computer.
Access to the data on your iST7 is done from within the Te Pari Downloader program.
Note: In certain situations, it may be necessary to connect using another method other than the USB direct cable connection, if required, please contact support for advice on Wi-Fi, Bluetooth, or serial cable connection.

Te Pari Downloader Home Screen
The Home menu bar. This appears each time the application is opened. This screen shows:
- Connected items buttons: Click the button for the device you wish access the files on.
- The Contacts button. Clicking this opens the Contacts main area. This is where you add and edit your contacts list.
- The System tab. Clicking this opens the System menu bar shown below
Te Pari Downloader System Screen
This screen is where you can change the appearance of the app, register, change system settings and get web help or remote support. From left to right on the screen you'll see:
- The Appearance options menu. This area has a range of colour schemes that you can select from to change the way that the application looks on screen.
- The Registration button. You can open this and change your registered details, Name, address, phone numbers, etc.
- The System button for accessing the system and connection options such as the USB connection port that you have plugged your iStick into.
- The Web Help button. Opens the Te Pari Support web area.
- Remote Support button. Activates remote assistance for online remote support sessions and problem-solving. Usually, support will request and or advise when its use is required.
- The About button displays version and ownership information.
The first time you use Te Pari Downloader app, you'll need to select the iStick device:
- If the iStick button isn't showing on the Home screen, then you will need to go to the System tab, click on Te Pari iStick7.

Accessing your iStick files from the Downloader app
- With your iStick connected to your computer, to go the Home tab, click on the Te Pari iStick button.
- The first time you use the app you may need to select the USB Serial Port (the COM number may vary) from the drop-down menu, highlighted in the image below at the left.
- Check the Open Port check box. Once you have done this, the datasets will load from the iStick into Downloader; you may also need to click the Get Records button.
- The main working window opens as shown below. Some of the areas shown here will not be populated yet.
Export options and preview buttons
- Clicking the Export to Excel button opens a standard Windows Save As dialogue box, the radio buttons give you the option of saving as either xlsx, xls or csv file formats which can all be opened in Microsoft Excel.
- Clicking the Preview/Export button opens the Preview window shown below.
- The Clear All Records from reader does what it says, you will be prompted to make sure you wish to do this before all the records are removed.

Battery Replacement
Although not normally required because of the long operating time of the battery pack, it is possible to change it. This might be necessary if the pack has reached the end of its life cycle.
Remove the 2 flat-head-screws by using the provided screwdriver. Lift the battery cover and take out the battery. The battery has embossed arrows on it that point to the tip of the reader. The battery housing also has arrows to show the battery orientation.
After the new battery pack has been inserted, close the battery cover again and tighten the two flat-headscrews.
Dispose of your expended battery thoughtfully.

Warranty
Your Te Pari iStick 7 Reader has a 12 month warranty from the date of purchase on its functionality. This warranty does not cover the internal battery or any damage caused by misuse. Any modification to the AWR300 Reader Electronic will render the warranty null and void.
Wipe your reader down if it's dirty with a clean and soft cloth that is slightly damp, be careful not to scratch the screen.
Specifications
- Battery: 7.4V Lithium-Ion battery with a capacity of 2.600mAh, max charge time is 3.5 hours from flat
- Battery charge temperature range: 0 - 45° C - Can be charged while in operation
- Approximate battery work time: 30 hours non-reading time, 10 hours continuous read
- Display area: 320 x 240 pixels colour TFT
- Length and Weight: 650mm long with an operational weight of 750 gms
- Visual, audible and vibration notification feedback options
- USB, RS232, Wi-Fi and Bluetooth connections and interface options available
- Extended and advanced database and work list features through Te Pari Downloader
- Auto suspend mode with adjustable timeout
- Multiple groups with up to 10,000 records in a single group - 1,000,000 records maximum